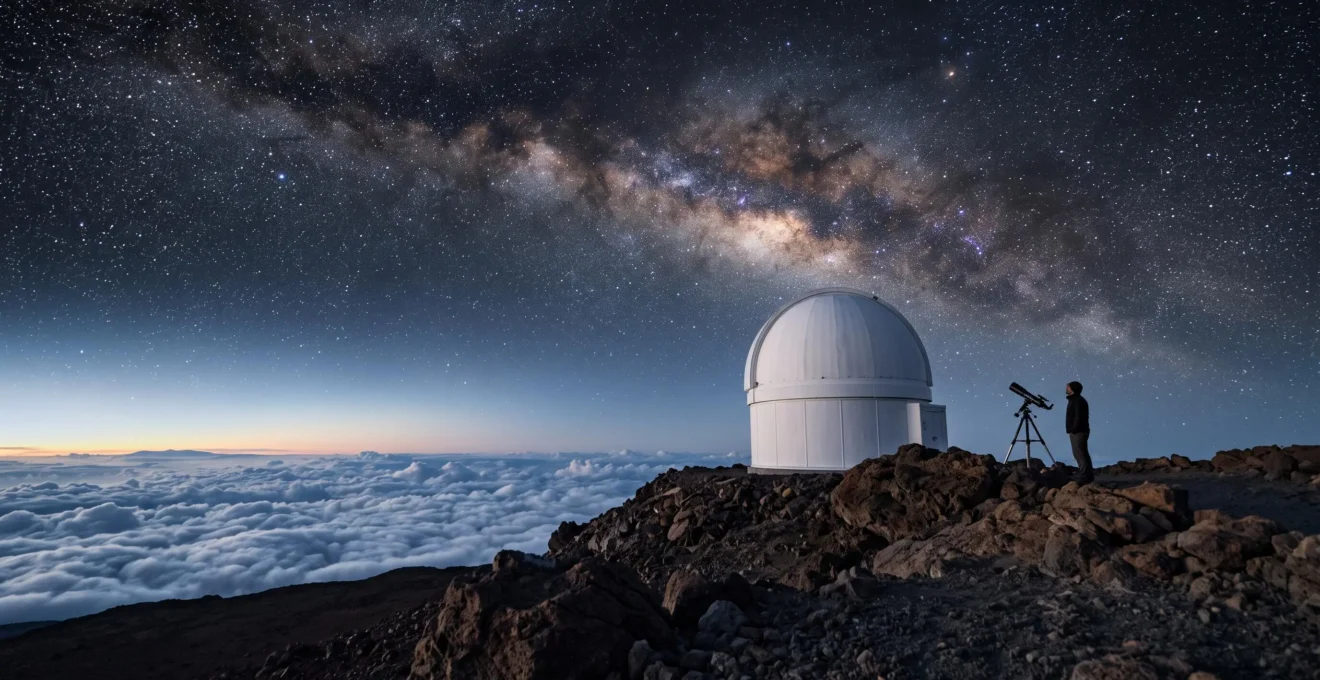
The key to observing faint nebulae isn’t just a bigger telescope; it’s accessing the exceptionally stable atmospheric conditions found only at high-altitude, oceanic sites.
- Professional-grade optics combined with stable “seeing” conditions allow telescopes to achieve their true resolving power, turning faint smudges into detailed structures.
- Guided tours provide access to this restricted environment and the large-aperture instruments required to cross the visibility threshold for deep-sky objects.
Recommendation: For amateur astronomers looking to bridge the gap between hobbyist viewing and profound cosmic observation, booking a guided tour at a certified high-altitude observatory is the most effective next step.
For the dedicated amateur astronomer, the quest is perpetual: to see deeper, clearer, and further into the cosmos. You’ve likely invested in a quality consumer telescope, mastered star-hopping, and spent countless nights chasing faint fuzzies from your backyard. Yet, the glorious, structured nebulae and detailed galactic cores seen in magazines remain elusive, often appearing as little more than faint, disappointing smudges. The common advice—escape city lights—is only the first, most basic step.
The conversation often stops at light pollution, but the true barrier to deep-sky observation is far more subtle and powerful: the atmosphere itself. We are told to buy bigger telescopes to gather more light, but what if the light reaching your location is already scrambled beyond recognition? The secret lies not just in darkness, but in atmospheric stability, a quality that is exceptionally rare at sea level. This is where the world of professional astronomy offers a profound upgrade, accessible through specialized guided tours.
This guide moves beyond the platitudes of “dark skies.” We will explore the specific physics of why high-altitude and isolated oceanic locations provide a superior window to the universe. Forget simply seeing more stars; we are talking about accessing a different class of observation entirely. The true value proposition of a guided observatory tour is its ability to lift you above the turbulent atmospheric sea, providing access to equipment and skies that allow you to witness the universe with a clarity that is physically impossible to achieve from home. It’s about crossing a critical threshold—from merely detecting an object to truly resolving its magnificent structure.
This article breaks down the essential components that enable this next-level experience. We will explore the science behind superior atmospheric conditions, the practicalities of booking certified tours, and how you can get the most out of your time at a world-class observatory.
Summary: A Guide to Unlocking Deep-Sky Detail
- Why Professional-Grade Optics Reveal Nebulae Invisible to Consumer Telescopes
- How to Book Astronomy Tours With Certified Starlight Guides
- Group Observatory Visits vs Private Telescope Rental: Which Suits Beginners?
- How to Photograph Planets Using Smartphone Adapters on Provided Telescopes
- The Weather Miscalculation Wasting 50% of Pre-booked Stargazing Tours
- Why Altitude and Oceanic Isolation Create the Clearest Atmospheric Conditions
- Self-Guided Exploration vs Ranger-Led Walks: Which Grants Deeper Park Access?
- Why Starlight Foundation Designates Only 6 Atlantic Locations Worldwide
Why Professional-Grade Optics Reveal Nebulae Invisible to Consumer Telescopes
Many amateur astronomers believe that aperture size is the only factor in seeing faint deep-sky objects (DSOs). While a larger mirror gathers more light, it’s the quality of the optics combined with the stability of the atmosphere that determines the telescope’s resolving power. A professional-grade instrument in a prime location doesn’t just make a nebula brighter; it reveals the intricate dust lanes, glowing H-II regions, and stellar nurseries within it. These details are often lost in the “noise” created by atmospheric turbulence and the subtle imperfections of mass-market lenses.
Think of it as the difference between a standard definition and a 4K television. Both show an image, but one reveals a world of texture and detail invisible on the other. A high-quality observatory telescope has meticulously polished mirrors and advanced coatings that minimize light scatter and maximize contrast. When you look through such an eyepiece, the background sky appears truly black, making faint tendrils of gas in objects like the Veil Nebula or the spiral arms of the Whirlpool Galaxy pop into view.
This is the “object-revelation” aspect of a guided tour. You are not just using a bigger light bucket; you are using a precision instrument designed to translate faint, ancient light into a structured, detailed image. For many DSOs, there is a ‘seeing’ threshold below which they are fundamentally invisible, no matter the aperture. Accessing professional optics at a high-altitude site is what gets you across that threshold, transforming your observing experience from a hunt for smudges to a tour of cosmic architecture.
How to Book Astronomy Tours With Certified Starlight Guides
Finding a truly exceptional stargazing location goes beyond a simple “dark sky” map. To guarantee a world-class experience, look for tours operating in areas certified by the Starlight Foundation. This designation is not just about darkness; it’s a rigorous scientific certification that ensures optimal atmospheric conditions for astronomy. It provides a benchmark for quality that amateur astronomers can trust, removing the guesswork from planning an expensive trip.
What does “certified” really mean? The criteria are strict and technical. For instance, official Starlight certification criteria require the sky brightness to be above 21 mag/arcsec² and, crucially, for the ‘seeing’ to be 3 arcseconds or less. This ‘seeing’ value is a direct measure of atmospheric stability—the lower the number, the less the stars twinkle and the sharper the telescopic image. Booking a tour in a certified location means you are paying for access to skies that are scientifically verified to be calm and transparent.
Furthermore, the best tour operators staff their sessions with expert guides. These are often professional or highly experienced amateur astronomers who do more than point out constellations. As TravelQuest International, a provider of high-end tours, notes, their goal is to provide deep context. This expert guidance is invaluable, as they can operate the complex telescopes, select objects that are peaking at that specific time, and explain the astrophysical significance of what you are seeing. They are your translators for the cosmic language written in light.
“There is always an astronomer along on these trips to help guide you through the cosmos during the evening.”
– TravelQuest International, TravelQuest Stargazing Tours
Group Observatory Visits vs Private Telescope Rental: Which Suits Beginners?
Once you’ve decided on a destination, you’ll often face a choice: join a scheduled group visit or arrange a private rental of a telescope and guide. For a beginner or even an intermediate amateur astronomer stepping up to a professional observatory for the first time, the group visit is almost always the superior choice. The primary benefit is the curated experience and shared discovery.
In a group setting, the guide manages the “observing program.” They will have a list of spectacular objects perfectly positioned for viewing, ensuring you don’t waste precious dark-sky time hunting for targets or struggling with an unfamiliar, complex telescope mount. This allows you to focus entirely on the act of observing and absorbing the information being shared. There’s also a powerful social element; the shared gasps of awe as the view shifts from Jupiter’s bands to the ethereal glow of the Orion Nebula create a memorable and encouraging atmosphere.
As seen in the image, the dynamic between a guide and an engaged group is central to the experience. The guide can tailor their explanations to the group’s knowledge level, answer questions, and foster a collaborative sense of exploration. While a private rental offers more freedom, it also places the burden of planning the observing session squarely on your shoulders. For those not intimately familiar with the capabilities of a 20-inch Dobsonian or a 14-inch Schmidt-Cassegrain on a German equatorial mount, a group tour is the fast track to breathtaking views without the steep learning curve.
How to Photograph Planets Using Smartphone Adapters on Provided Telescopes
One of the most exciting developments in amateur astronomy is the ability to capture impressive images of the cosmos with the camera you already own: your smartphone. While not a substitute for a dedicated astrophotography rig, modern phones paired with a simple adapter on a large observatory telescope can yield stunning photos of the Moon and bright planets like Jupiter and Saturn. The growing demand for astrophotography experiences on tours reflects this accessible entry point into capturing the sky.
The process, known as afocal photography, involves holding the phone’s camera lens directly to the telescope’s eyepiece. A universal smartphone adapter makes this vastly easier by clamping the phone securely in the perfect position. The large aperture and high-quality optics of the observatory’s telescope do the hard work of gathering light and magnifying the image; your phone simply acts as the digital sensor to record the view. Many guides are happy to help guests mount their phones for a quick snapshot.
For the best results, use your phone’s “pro” or “expert” camera mode. This allows you to manually control settings like ISO (keep it low to reduce noise), shutter speed (adjust for brightness, usually very fast for planets), and focus (lock it to infinity if possible). Even a short video can be powerful; free software can later “stack” the best frames from the video to create a single, sharper image than any individual snapshot. Capturing your own image of Saturn’s rings is a thrilling and tangible souvenir of your deep-sky journey.
Action Plan: Your Smartphone Astrophotography Checklist
- Gear Audit: Ensure you have your smartphone and a universal telescope adapter. Download a camera app that allows manual control (Pro mode, Halide, etc.).
- Pre-Session Practice: Practice mounting your phone on the adapter and finding the camera’s ideal position over the eyepiece in daylight. It saves valuable dark time.
- On-Site Settings: Once on the telescope, switch your phone to “pro” mode. Start with a low ISO (100-400) and adjust the shutter speed until the planet is well-exposed without being blown out.
- Focus & Capture: Use the screen to magnify the image and tap to focus precisely on the planet’s edge or a feature like Jupiter’s Great Red Spot. Capture a series of still images or, even better, a 30-60 second video in the highest resolution possible.
- Post-Processing Plan: Plan to use free software like PIPP (to center the planet in the video frames) and AutoStakkert! (to stack the best frames into one clear image) on your computer later.
The Weather Miscalculation Wasting 50% of Pre-booked Stargazing Tours
There is a harsh reality that every astronomer knows: the universe is patient, but the weather is fickle. The single biggest mistake travelers make is assuming that booking a tour at a world-class dark-sky site guarantees clear skies. The data reveals a sobering truth: even certified dark-sky reserves average only about 50% of nights being clear enough for observation. Planning a trip without a weather contingency is, statistically, a coin toss.
This doesn’t mean these locations aren’t worth it—they absolutely are, as the quality of a clear night there is unparalleled. However, it fundamentally changes how one should plan a trip. Instead of a single-night, high-stakes booking, the savvy approach is to book a multi-night stay in the area. A three-night trip dramatically increases your odds of getting at least one, if not two, pristine nights of observing. Many tour operators understand this and offer flexible booking or “weather-check” calls on the day of the tour.
Beyond just cloud cover, another factor is the atmospheric ‘seeing’. A night can be cloud-free but have high-altitude jet streams causing the air to be turbulent, making stars twinkle furiously and planetary details blur. As the experts at Sky & Telescope magazine point out, there is a simple, powerful diagnostic tool you can use. This practical knowledge, combining statistical reality with on-the-ground assessment, separates a successful astronomy trip from a frustratingly cloudy one.
“You can judge the atmospheric seeing with the naked eye by checking how much stars twinkle.”
– Sky & Telescope, How to Successfully Beat Atmospheric Seeing
Why Altitude and Oceanic Isolation Create the Clearest Atmospheric Conditions
The primary reason high-altitude observatories deliver breathtaking views is that they are physically located above the most turbulent, dirty, and moist layers of the atmosphere. Most weather and atmospheric distortion occurs in the lowest few kilometers of the troposphere. By placing an observatory on a high mountain, especially one isolated in the middle of an ocean, astronomers gain access to a smoother, drier, and more stable column of air.
This is not just a theory; it’s a measurable phenomenon. The key metric is “astronomical seeing,” measured in arcseconds. A smaller number indicates a steadier atmosphere and sharper images. While a typical sea-level location might have seeing of 3-5 arcseconds on a good night, high-altitude sites are in another league. For example, long-term atmospheric monitoring at high-altitude sites shows a median seeing value of just 0.89 arcseconds at an altitude of 4,500 meters. This leap in stability is what allows a telescope to achieve its theoretical resolving power.
Oceanic isolation plays a crucial role by creating what is known as laminar flow. Wind traveling thousands of kilometers over a flat ocean surface arrives at the island’s coast with very little turbulence. As this smooth air rises up the mountain slope, it remains stable, unlike the chaotic, churning air found over large continental landmasses. This combination of altitude and laminar flow is the holy grail for observational astronomy, creating the perfect conditions to resolve fine details in distant galaxies.
Self-Guided Exploration vs Ranger-Led Walks: Which Grants Deeper Park Access?
When visiting a national park designated as a dark-sky reserve, you have a choice: explore on your own with binoculars, or join a guided program. For the specific goal of revealing deep-sky objects, the guided option provides access that is profoundly deeper, both literally and figuratively. While self-guided exploration offers freedom, it is limited by the equipment you can carry and your own knowledge of the night sky.
A ranger-led or guide-led astronomy program, by contrast, is a gateway to the park’s premier astronomical assets. These programs utilize large, often permanently mounted telescopes that you could never bring on your own. More importantly, they come with an expert who can unlock the potential of that equipment. A guide does more than just point the telescope; they are interpreters of the cosmos. As spain.info highlights in its promotion of La Palma’s astrotourism, a guide is essential for contextualizing the view, transforming it from a pretty picture into a meaningful observation.
This guided model grants access to a layer of the park experience that is simply unavailable to the self-guided visitor. It’s the difference between walking through a library and having the head librarian show you the most fascinating, hidden manuscripts. For an amateur astronomer seeking to truly connect with the cosmos, a guide is the key that unlocks the door to the deep universe.
Case Study: The Joshua Tree Astronomy Adventures Guided Access Model
A prime example of this principle is seen with Joshua Tree Astronomy Adventures. They lead stargazing tours within the famous National Park, utilizing state-of-the-art telescopes and expert guides. For beginners or even seasoned amateurs, their service illustrates how a guided model grants far deeper cosmic access—helping them identify faint galaxies and nebulae—than what would be possible through self-guided exploration with personal equipment alone.
Key Takeaways
- Atmospheric stability (seeing), not just darkness, is the limiting factor for detailed deep-sky observation.
- High-altitude, ocean-isolated locations offer scientifically superior seeing conditions, allowing telescopes to reach their full resolving power.
- Guided tours at certified Starlight Reserves provide amateurs with access to professional-grade equipment and expert knowledge that is unattainable from home.
Why Starlight Foundation Designates Only 6 Atlantic Locations Worldwide
The Starlight Foundation’s list of designated sites is a guide to the world’s best skies, but it’s important to understand its tiers. There are many “Starlight Certified” destinations, but the pinnacle designation is the “Starlight Reserve.” This top tier is exceptionally rare because it requires not just pristine skies but also a large, protected core zone and a buffer zone with strict lighting regulations, demonstrating a long-term community and governmental commitment to preserving the night. The rarity of this status highlights the immense value of these locations.
The numbers tell the story: in a country like Spain, a world leader in astrotourism, there are over 60 certified destinations. However, a detailed look reveals that of the many Starlight-certified sites, only a handful reach full Reserve status, with just 17 achieving this elite recognition. This shows how few locations on Earth meet the rigorous, holistic criteria for a Reserve. The Atlantic region, with its unique atmospheric benefits, hosts several of these gems, but their scarcity underscores their global importance.
The island of La Palma is the quintessential example of a Starlight Reserve. Its sky quality is the result of a perfect trifecta of factors. First, its Roque de los Muchachos Observatory sits at over 2,400 meters, placing it above the turbulent “sea of clouds” where the air is stabilized by the vast Atlantic. Second, this natural advantage is fiercely protected by the “Sky Law,” pioneering legislation passed in 1988 to control light pollution and regulate flight paths. This decades-long synthesis of natural blessing and human foresight is precisely why earning the title of Starlight Reserve is so difficult, and why a visit to one offers an astronomical experience of unparalleled quality.
Now that you understand the science and logistics, the next step is to transform this knowledge into an unforgettable experience. Participating in a guided tour at one of these elite locations is the most direct path to witnessing the deep-sky objects you’ve only dreamed of. Your journey to resolving the universe’s finest details begins with finding and booking your expedition.